Guide
How to Clean a Fountain Pen: Complete 2026 Step-by-Step Guide
Published: 2026-04-29 · Updated: 2026-04-29
I have ruined two pens by being lazy about cleaning. One was a $40 Pilot Metropolitan that dried up so badly I needed three weeks of soaking to get it usable again. The other was a beloved 1950s Parker 51 where I used the wrong cleaning solution and damaged the sac. Both mistakes were avoidable, and both taught me that learning how to clean a fountain pen properly is not optional — it is the single biggest factor in whether your pens last six months or sixty years.
This guide is everything I have learned the hard way over the last decade. I will walk you through when to clean, what tools you actually need, step-by-step instructions for every common filling system, deep cleaning protocols, what absolutely not to do, and how to revive pens that have been sitting dry for years.
When Should You Clean a Fountain Pen?
There is no single right answer, but here is the schedule I follow and recommend:
Every ink change. Always. Mixing inks inside a pen is how you create gunk. Even compatible inks from the same brand can react with residue from a previous fill. If you are switching from a black to a blue, or from a Pilot ink to a Diamine, flush completely first.
Once a month for daily writers. If a pen is in your rotation and getting used most days, do a quick water flush every four to six weeks. This prevents pigment buildup in the feed channels that gradually starves the nib of ink.
After any storage period of two weeks or more. Ink left sitting evaporates and concentrates. The water boils off but the dyes, surfactants, and (in some inks) iron-gall components stay put. What returns from a two-week vacation is no longer the ink you put in — it is a sludge.
Before you sell, gift, or lend a pen. Always. A clean pen with no ink in it is the only acceptable handover state.
Immediately if you see scratchy writing, hard starts, or skipping. Nine times out of ten, these symptoms are not nib problems — they are dirty feeds. Try cleaning before you panic about regrinding the nib.
Never on a schedule alone. A pen filled with well-behaved ink that you use every single day genuinely does not need a monthly flush. Use your eyes and your handwriting. Cleaning is a response to a state, not a calendar event.
The Tools I Actually Use
You can spend a lot of money on cleaning kits. You should not. Here is the minimum kit that handles 95% of cleaning jobs:
- A bulb syringe (ear syringe). The blue rubber kind sold for cleaning baby ears, available at any pharmacy for under $5. This is the single most important tool. It generates the gentle pressurized water flow that pushes ink out of feed channels.
- A small glass cup or shot glass. For soaking nib units. Glass not plastic — plastic stains and absorbs scent.
- A microfiber cloth. Lint-free. Old microfiber polishing cloths work perfectly. Avoid paper towels, which leave fibers in the nib slit.
- Cool tap water. That is it. Filtered if your tap water is very hard, but tap water is fine in most cities.
- A dish towel to lay everything on while it dries.
That is the basic kit. For deep cleaning, add:
- Household ammonia, the unscented kind. You will dilute it 1:10 with water — one part ammonia, ten parts water. This is for stubborn ink, especially saturated reds, oranges, and shimmer inks.
- A pen flush product like Goulet Pen Flush or Monteverde Cleaning Solution if you do not want to mix ammonia yourself. They cost about $10 a bottle and last years.
- A silicone grease tube ($3, eBay) for re-lubricating piston seals after deep cleaning.
That is everything. No ultrasonic cleaners, no specialty brushes, no chemicals from the chemistry stockroom.
Step-by-Step: Cleaning a Cartridge/Converter Pen
This is the most common modern filling system and the easiest to clean. Examples: Lamy Safari, Pilot Metropolitan, TWSBI Swipe, most modern Pelikans below the M400.
- Unscrew the section from the barrel. Pull the cartridge or converter off the back of the section. Set the empty cartridge aside or empty the converter into a paper towel.
- Run cool water through the section from the back. Hold the section upside down under a slow tap. You will see ink streaming out the nib. Keep going until water runs clear — usually 30 to 60 seconds.
- Fill the bulb syringe with cool water. Press the syringe nozzle firmly against the back of the section where the cartridge would attach. Squeeze gently to push water through the feed and out the nib. Repeat 5 to 10 times until the water exiting the nib is completely clear.
- If you have a converter, flush it separately. Submerge the converter nose in water, fill it, empty it, repeat until clear. Saturated inks may take 10+ cycles.
- Soak the nib unit in fresh water for 15 minutes. Just the nib and section, with the back submerged. This pulls remaining ink out of the porous feed material.
- Dry on a microfiber cloth, nib down, for at least 4 hours. Overnight is better. Wet feeds will dilute your next ink fill and produce weak lines for the first day.
Total active time: about 5 minutes. Total elapsed time: overnight.
For more on different filling mechanisms, see my fountain pen filling systems guide.
Step-by-Step: Cleaning a Piston Filler
Piston fillers — TWSBI 580, Pelikan M400 and up, Lamy 2000, Montblanc 146 — have an integrated reservoir, so the cleaning approach is different.
- Empty the pen by holding nib-down over a paper towel and unscrewing the piston knob fully to expel ink. Wipe the nib.
- Submerge just the nib and section in cool water. Twist the piston knob to draw water in, then expel back out. This is the same motion as filling and emptying, but with water.
- Repeat 10 to 15 times. The first few cycles will produce dark water. Keep going until the expelled water is colorless. If you have a TWSBI or another demonstrator, you can see this happening — very satisfying.
- Leave the pen filled with clean water and let it sit for 30 minutes. This dissolves ink hiding in the corners of the piston seal area.
- Empty, then do three or four final water cycles to confirm clarity.
- Drain fully, then store nib-up for several hours to let internal moisture evaporate. If you want to fill again immediately, that is fine — just expect the first paragraph to write a little wetter than usual.
Many piston fillers (TWSBI especially) are designed for periodic full disassembly. Once a year, with the supplied wrench, I unscrew the piston, wipe everything, regrease the seal with silicone grease, and reassemble. Takes 10 minutes and dramatically extends the pen’s life.
Step-by-Step: Cleaning a Vacuum Filler
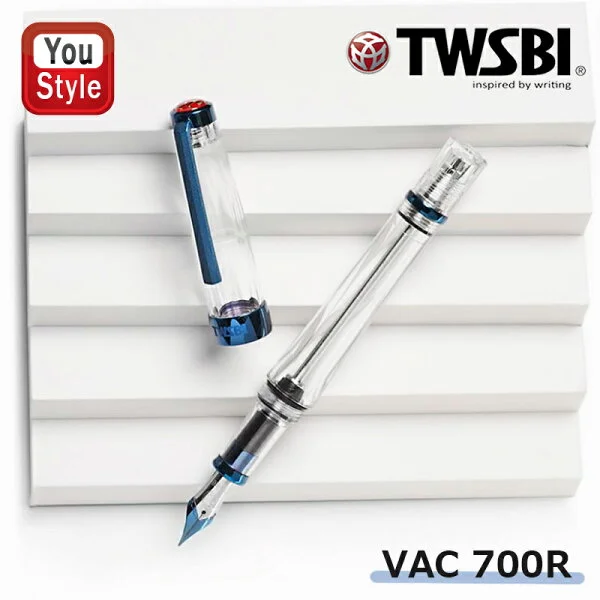
Vacuum fillers — TWSBI Vac700R, Pilot Custom 823, Visconti Homo Sapiens with the power filler — have a plunger system that produces a vacuum to draw ink. They are wonderful but require a little more patience to clean because the chamber is large.
- Open the shut-off valve if your pen has one (the Custom 823 and Vac700R both do — unscrew the back knob a half turn). This is critical. Without the valve open, water cannot enter the main reservoir.
- Empty all ink by depressing the plunger fully with the nib over a paper towel.
- Submerge the nib in cool water. Slowly pull the plunger up, drawing water in. Push it back down to expel. Each cycle moves a relatively small amount of water through the feed.
- Repeat 15 to 20 times. Vac fillers hold a lot of ink, and the geometry means dye sticks around. Be patient.
- Leave the pen filled with water for 1 hour.
- Empty, then do five final cycles to confirm clean output.
- Close the shut-off valve before storing dry.
If you let a vac filler dry out with ink inside, restoration becomes a project. I learned this with a Custom 823 that sat for eight months — I needed three days of soaking and ammonia treatment to recover it.
Deep Cleaning with Diluted Ammonia
For pens that have stubborn staining, sat dry too long, or held a particularly aggressive ink, plain water is not enough. This is when I bring out the ammonia.
The recipe: 1 part household ammonia (clear, unscented, sold for cleaning) to 10 parts cool water. Mix in a glass cup. Do this in a ventilated area — the smell is unpleasant.
The protocol:
- Disassemble the pen as much as you reasonably can. For cartridge/converter pens, remove the converter. For piston fillers, do not disassemble the piston unless you are confident.
- Soak the nib and section (just those parts, nib-down) in the diluted ammonia for 30 minutes. Not longer. Ammonia is mild but extended exposure can dull gold plating and damage some plastics.
- Flush thoroughly with plain water using your bulb syringe. Ten or more cycles. The smell should disappear completely.
- Soak in plain water for another 15 minutes to extract residual ammonia.
- Final flush, then dry overnight nib-down on a microfiber cloth.
Diluted ammonia dissolves dried ink in a way water alone cannot, because most fountain pen inks use mildly basic dyes that respond to a slightly more basic solvent. It works on virtually every modern ink — saturated reds, shimmer inks, and dried Iroshizuku I have all rescued this way.
For more on which inks tend to be problematic, my best fountain pen inks roundup flags the well-behaved ones versus the demanding ones.
What NOT to Do
This list is shorter than the list of things you should do, but every entry is something I or a friend has learned the painful way.
Never use acetone, nail polish remover, or any ketone-based solvent. These will craze and crack pen plastics, especially older celluloid and acrylics. There is no such thing as “a tiny bit just to clean the nib.” It will travel.
Never use isopropyl alcohol or rubbing alcohol on rubber sacs. Vintage pens with latex sacs (most lever-fillers, button-fillers, aerometric Parker 51s) will have those sacs harden and crack from alcohol contact. Water only for sac pens.
Never use hot water on celluloid or vintage hard rubber. Hot water causes celluloid to warp and discolors hard rubber irreversibly to a sickly brown. Cool tap water only. If you cannot stand to put your hand in it, it is too hot for the pen.
Never use bleach. I cannot believe I have to say this, but I have seen forum posts where people tried it. Bleach destroys nibs, plastics, and every metal component it touches.
Never put a fountain pen in an ultrasonic cleaner unless you have removed the nib unit and are cleaning only that. Ultrasonics can damage pressed-fit assembly, loosen glued sections, and ruin lacquer finishes.
Never store a pen with ink inside if you will not use it for a month or more. Just clean it. The five minutes you save by skipping the flush will cost you an hour later.
Never assume distilled water is necessary. It is not. Tap water works fine in almost all cities. If you live somewhere with very hard water, filter it — but distilled water is overkill for routine cleaning.
For more on long-term storage and care, see my full fountain pen care and maintenance guide.
Restoring Stuck or Dried-Out Pens
Sometimes you inherit a pen, find one in a drawer, or buy a vintage piece that has been sitting dry for years. Here is the recovery protocol.
Step 1: Diagnose. Is the pen mechanically stuck, or just full of dried ink? Try gently turning the piston or pressing the converter. If it moves freely but no water flows, you have ink crust. If it does not move at all, you have mechanical sticking.
Step 2: Long water soak. Submerge the nib and section in cool water for 24 hours. Change the water at hour 12. Most modern pens recover from this alone.
Step 3: Diluted ammonia soak if water is not enough. 30 minutes only, then thorough water rinse.
Step 4: For mechanical sticking, never force it. A stuck piston usually means a dry seal. Drop a tiny amount of pure silicone grease into the barrel, let it work into the seal overnight, then try again gently. If it still does not move, take it to a nibmeister rather than risk cracking the barrel.
I have rescued maybe a dozen vintage pens this way over the years. The slow, patient approach works far more often than aggressive attempts. For specific guidance on older pens, see my vintage fountain pens guide.
Honest Downsides of Regular Cleaning
I want to be straight with you: cleaning is a chore. It takes time, the drying step means you cannot just refill and write, and if you do it wrong you can damage a pen. Some people in the hobby never clean their daily writers and they are fine — the inks they use behave themselves and they refill before evaporation matters.
If you are using only one pen and only one well-behaved ink (say, a Lamy Safari with Lamy blue cartridges), you can probably skip routine cleaning and only do it on ink change. That is a legitimate approach. The cost of cleaning is real and pretending otherwise is dishonest.
But if you have a rotation of pens, use varied inks, or care about pens lasting a generation, cleaning is the cheapest insurance you will ever buy. A bulb syringe and 10 minutes a month is a much better deal than a $200 nib regrind or a $40 cracked feed.
Frequently Asked Questions
How often should I clean my fountain pen? Every ink change without exception, plus once a month for daily writers and after any two-week dry spell. Skip the calendar if you only use one ink and the pen writes well.
Can I use dish soap to clean my fountain pen? No. Dish soaps leave a residue that interferes with ink flow and can damage some plastics. Use water alone, or diluted ammonia for stubborn cases. Pen flush products are also fine.
Is distilled water necessary? No. Tap water is fine in most cities. If you have very hard water, use filtered water. Distilled water is unnecessary expense for routine cleaning.
How long should I let a pen dry before refilling? At least 4 hours, ideally overnight. Wet feeds dilute fresh ink and produce weak lines for the first day or two. If you are impatient, a hairdryer on cool setting from 30cm away for 30 seconds helps.
Can I clean a fountain pen with vinegar? I do not recommend it. Vinegar is acidic and can corrode some metal nib components and steel pen parts over time. Stick with water or diluted ammonia.
Why does my pen still skip after cleaning? Either it is not fully dry, or you have a nib alignment issue rather than a cleaning issue. Let it dry overnight first. If skipping persists with fresh ink in a fully dry pen, the problem is mechanical, not chemical.
Should I clean a brand new fountain pen before first use? Yes, always. Manufacturing oils and assembly residue are common, and a single water flush before first ink fill produces noticeably better flow. This is especially true for budget pens — see my best fountain pens for beginners and best fountain pens under $100 for specific recommendations on starter pens worth this small effort.
What if my pen still has ink stains after cleaning? Cosmetic staining inside a demonstrator is sometimes permanent, especially after saturated inks. Function is unaffected. If you cannot stand the look, full disassembly and a magic eraser on plastic parts (never on the nib or feed) sometimes helps. Most of the time, accept it as character.
Final Word
Cleaning a fountain pen is one of those tasks that seems annoying until you have done it ten times, at which point it becomes meditative. Five minutes at the sink with a bulb syringe and warm — sorry, cool — water is genuinely all most pens need, most of the time. Start there, build the habit, and your pens will outlast you.
🖊️ Featured Pens in This Article